
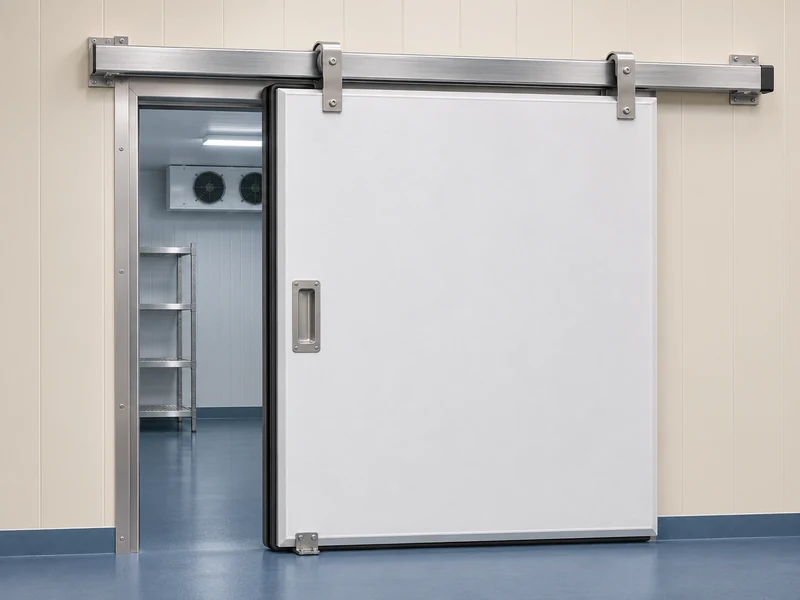
On a cold room sliding door, early seal trouble usually shows up as a change in how the gasket looks or grips when the leaf seats. Look for a corner that has taken a permanent set, a fresh rub line or a section that has lifted out of its carrier. Close the leaf and compare contact around the opening before ordering a replacement gasket.
Where Should You Look Before the Door Starts to Ice?
Inspect the rubber after the door and contact surface are clean and dry. Start at the lower corners, follow the closing edge upward, then look across the top and along the trailing side. Take photos with light at a low angle so cuts and flattened areas show as changes in profile.
LINBLE’s sliding cold room door range includes manual and powered configurations. The useful reference for inspection is the gasket profile and closing arrangement supplied with the installed door. Check the order records or take a profile photo with a ruler next to a sound part of the seal.
| Early Sign | What to Look at Next | Detail Worth Recording |
| Rubber flattened across a short patch | Compare its shape when the door is open with a sound section | Which side and how far from the corner |
| Hairline split where the gasket bends | Check for stretching, impact or rubbing at the corner | Whether the split opens when the gasket flexes |
| Clean stripe or polished line on the contact face | See whether it extends evenly along the mating surface | Where the stripe stops or becomes broad |
| Rubber pulling out of the carrier | Inspect the retaining edge and any local deformation | Whether the groove is damaged or contaminated |
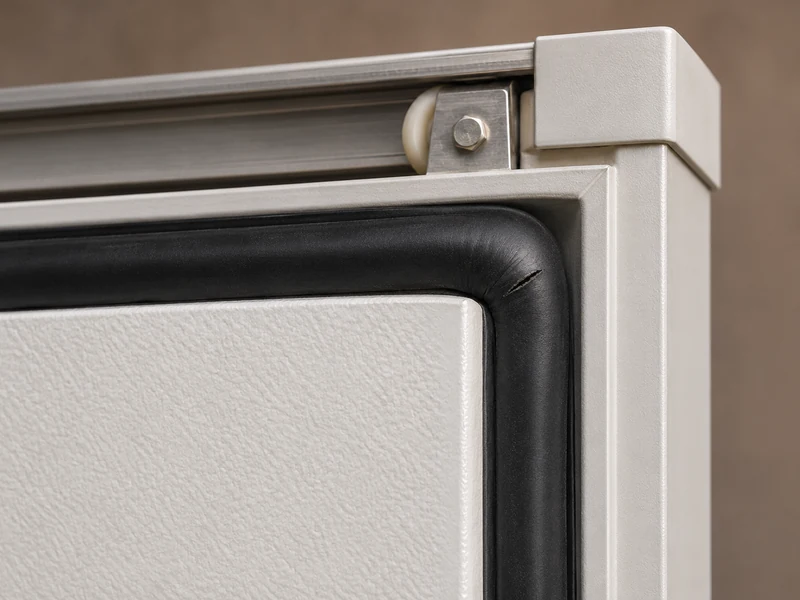
Can a Gasket Look Intact and Still Leak?
Yes. A sound-looking gasket can lose its spring after repeated compression or fail to make contact where the panel is out of plane. In a chiller, a narrow damp line or a spot that repeatedly attracts dust may be the first visible clue.
Use the warm-side conditions as context. A wet entrance after washdown or a humid receiving shift gives you more reason to follow the pattern through several cycles. A short condensation line can also come from a cold bridge or an adjacent joint, so confirm the contact pattern before blaming the seal.
How Do You Tell Gasket Damage From a Door That Seats Unevenly?
Check whether the symptom stays at the same location over several normal closures. A cut or compression set remains in the rubber with the door open. A loose patch that moves or changes when the leaf closes at a slightly different position points toward the leaf, guide, stop or frame.
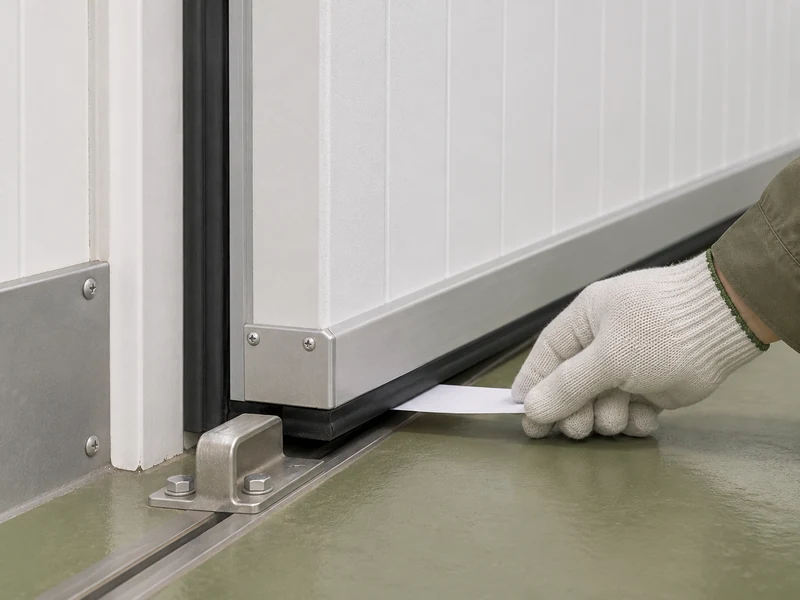
On a manual door that is safe to inspect, use light paper as a comparative feeler where the manufacturer permits it. Hold it in a few reachable positions, close the door normally and compare withdrawal resistance with a known sound area. Keep hands clear of pinch points, and have powered doors put into the site’s approved inspection state by authorized staff.
A strip that pulls free at one spot can help locate weak contact. It gives no rated leakage value, and friction depends on the gasket profile and contact direction. Mark the suspect point on the jamb and compare it to the open-door photos.
What Does the Floor Guide Tell You?
Watch a slow, normal close from a safe position. A lower guide that drags, carries debris or allows the leaf to wander can change how the last part of travel seats the seal. Scraping near the floor paired with a free paper strip higher up can indicate that the leaf is arriving out of square.
Clean accessible dirt using the site’s approved method and look for fresh witness marks. Ask a trained installer to check guide position, track condition and final stop against the original adjustment instructions. LINBLE’s modular room floor levelness guide is useful where trouble started after a floor repair or resurfacing near the threshold.
What If the Frame Is Damp but the Seal Grips Well?
Check where the moisture begins. A repeated damp line beyond the gasket contact surface can indicate a perimeter junction or cold frame surface, especially where a freezer opens into humid air. ASHRAE’s refrigerated-facility design chapter explains how moist air leakage and gaps at junctions can contribute to condensation and frost.
Review the equipment details in the LINBLE cold room door range and confirm what was installed. If the approved freezer detail includes a frame heater, an electrician can verify its operation under the prescribed test. The walk-in freezer frame heating guide shows why the heater and seal need to be considered together at the threshold and jamb.
If the symptom appears only after cleaning, record whether liquid reaches the track, carrier or floor transition. Check whether the approved cleaner and method are compatible with the installed rubber. Water left by cleaning can obscure the original pattern, so reinspect after the area returns to normal operating conditions.
How Can You Tell Whether the Problem Is Getting Worse?
Compare the same marked spots at a regular interval, with the door approaching its normal closed position. Note when the issue appeared and what changed nearby, such as a new trolley route, a replaced floor guide or a heavier cleaning cycle. A repeatable comparison is more useful than a collection of closeups with no reference to the location.
Suppose a dull area on the gasket turns into a shiny stripe over a week, and then a short split appears where the stripe reaches a lower corner. That sequence makes rubbing a better lead to investigate than the age of the gasket alone. Correcting the cause before fitting new rubber can keep the replacement from wearing in the same spot.
For a seal that is pulling out, ask the installer to check whether the carrier still holds the specified profile. A damaged groove can let a new gasket work loose during ordinary travel. Keep the removed part available until the correct section and fixing arrangement have been confirmed.
What Should You Send LINBLE Before Buying a Seal?
Send the door reference, opening size, operating temperature and clear photos of the carrier, an undamaged section and the point of failure. Include the shape of the cross-section and how the corner is formed if visible without dismantling the assembly. Describe whether the door is manual or powered and where it loses contact when fully shut.
For example, a torn lower corner with a bright scrape directly below it deserves a guide and threshold check alongside the gasket request. A flattened section across an otherwise square door may call for the correct replacement profile and a check that the new seal compresses as specified. Two photos taken with the leaf open and closed are often more useful than the nominal door size alone.
After an adjustment or replacement, run several normal door cycles and record where you checked contact. Look for smooth travel, clean closure and an even contact pattern before returning the door to regular use. Add the baseline photos to the site’s cold room commissioning or handover record so the next inspection can pick up a small change before it turns into recurring moisture or frost.